Java Spring Simple Login Example
Spring MVC Login Form is a basic example for all spring based applications. We can hardly imagine any web application without forms in it because forms have their own importance in web application development.
In this tutorial, we are going to see how forms are used in Spring Framework, and how spring forms are different from normal HTML forms.
Prerequisites for Spring MVC Login Form:
As part of this tutorial, I am going to implement a simple Spring-based Login Form. Though it is a simple login form, it requires more understanding about each and every newer thing init.
Spring offers different types of annotations to handling forms. Here are the typical annotations that every spring developer should know.
@Controller :
- @Controller is an annotation, used in Spring MVC Framework.
- @Controller annotation is a sub annotation of @Cmponent annotation.
- We can use @Controller annotation on top of the class only.
- It indicates that a particular class serves the role of controller in the MVC pattern.
- @Controller annotation acts as a stereotype for the annotated class, indicating its roles.
@RequestMapping :
- Like @Controller annotation, @RequestMapping annotation is also used in Spring MVC Framework.
- @RequestMapping annotation can be applied on top of the class and/or methods, and it should be used along with the @Controller annotation.
- It is used to bind an HTTP request to spring components or handler methods.
- Class level mapping binds a specific request to the Spring component (class), whereas method level mapping binds a specific request to a specific handler method.
@ModelAttribute :
- @ModelAttribute annotation can be used on top of a method or method argument.
- An @ModelAttribute on a method is used to populate the model with commonly needed attributes for example to fill a drop-down with states.
- @ModelAttribute on method arguments refers to a specific property in Model class ( M VC).
- Used to bind the data from form to controller
- It should be used along with @RequestMapping in Controllers
- @ModelAttribute is invoked before the actual controller method starts execution along with @RequestMapping
Recommended: Spring with Hibernate Integration Complete Example
Example for Spring MVC Login Form:
Here we are going to implement the Spring MVC Login form step by step.
Download Example : Spring MVC Login Form Example with STS (NEW)
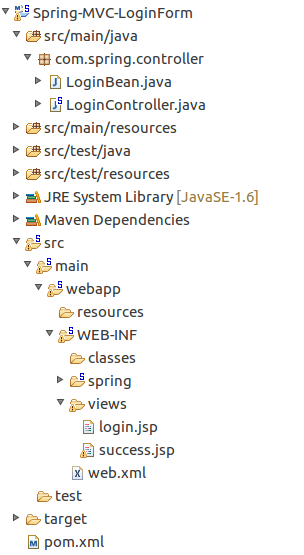
Project Structure:
Follow below project structure to add described files below.
<%@ page language="java" contentType="text/html; charset=UTF-8" pageEncoding="UTF-8"%> <%@taglib uri="http://www.springframework.org/tags/form" prefix="form"%> <!DOCTYPE html PUBLIC "-//W3C//DTD HTML 4.01 Transitional//EN" "http://www.w3.org/TR/html4/loose.dtd"> <html> <head> <meta http-equiv="Content-Type" content="text/html; charset=UTF-8"> <title>Spring Login Form</title> </head> <body> <form:form name="submitForm" method="POST"> <div align="center"> <table> <tr> <td>User Name</td> <td><input type="text" name="userName" /></td> </tr> <tr> <td>Password</td> <td><input type="password" name="password" /></td> </tr> <tr> <td></td> <td><input type="submit" value="Submit" /></td> </tr> </table> <div style="color: red">${error}</div> </div> </form:form> </body> </html> Points To Note :
- On the above login form, we used <form:form> tag. Which is given by the spring framework. To use this tag, we need to include the below taglib directory on top of the jsp page.
<%@taglib uri="http://www.springframework.org/tags/form" prefix="form"%> - The main advantage of using the <form: form> is, spring automatically binds the form data to the model bean whenever we submit this form. To make it work, the properties in the model class should be equal to the name of form data elements.
- For instance, we have created a text box field with the name userName and password field with the name password. The same names should be used as part of the Model class attributes.
Create a Login Model :
package com.spring.controller; public class LoginBean { private String userName; private String password; public String getUserName() { return userName; } public void setUserName(String userName) { this.userName = userName; } public String getPassword() { return password; } public void setPassword(String password) { this.password = password; } } Recommended: Spring Boot MVC Login Form Example
<?xml version="1.0" encoding="UTF-8"?> <beans:beans xmlns="http://www.springframework.org/schema/mvc" xmlns:xsi="http://www.w3.org/2001/XMLSchema-instance" xmlns:beans="http://www.springframework.org/schema/beans" xmlns:context="http://www.springframework.org/schema/context" xsi:schemaLocation="http://www.springframework.org/schema/mvc http://www.springframework.org/schema/mvc/spring-mvc.xsd http://www.springframework.org/schema/beans http://www.springframework.org/schema/beans/spring-beans.xsd http://www.springframework.org/schema/context http://www.springframework.org/schema/context/spring-context.xsd"> <!-- DispatcherServlet Context: defines this servlet's request-processing infrastructure --> <!-- Enables the Spring MVC @Controller programming model --> <annotation-driven /> <!-- Handles HTTP GET requests for /resources/** by efficiently serving up static resources in the ${webappRoot}/resources directory --> <resources mapping="/resources/**" location="/resources/" /> <!-- Resolves views selected for rendering by @Controllers to .jsp resources in the /WEB-INF/views directory --> <beans:bean class="org.springframework.web.servlet.view.InternalResourceViewResolver"> <beans:property name="prefix" value="/WEB-INF/views/" /> <beans:property name="suffix" value=".jsp" /> </beans:bean> <context:component-scan base-package="com.spring.controller" /> </beans:beans> Points To Note :
- <annotation-driven />, informs Spring container that we are going to use annotations in this application and can be used to identify annotations and to perform respective functions.
- Created a ViewResolver bean and mapped with the folder name where our actual views (JSP) are present as prefix and extension as a suffix
- Component scanning with <context:component-scan base-package="com.spring.controller" />, is telling spring that it should search the classpath for all the classes under com.spring.controller and look at each class to see if it has a @Controller, or @Repository, or @Service, or @Component and if it does then Spring will register the class with the bean factory as if you had typed <bean class="…" /> in the XML configuration files.
Configure the web.xml File :
<?xml version="1.0" encoding="UTF-8"?> <web-app xmlns:xsi="http://www.w3.org/2001/XMLSchema-instance" xmlns="http://java.sun.com/xml/ns/javaee" xsi:schemaLocation="http://java.sun.com/xml/ns/javaee http://java.sun.com/xml/ns/javaee/web-app_2_5.xsd" version="2.5"> <context-param> <param-name>contextConfigLocation</param-name> <param-value>/WEB-INF/spring/root-context.xml</param-value> </context-param> <listener> <listener-class>org.springframework.web.context.ContextLoaderListener</listener-class> </listener> <servlet> <servlet-name>appServlet</servlet-name> <servlet-class>org.springframework.web.servlet.DispatcherServlet</servlet-class> <init-param> <param-name>contextConfigLocation</param-name> <param-value>/WEB-INF/spring/appServlet/servlet-context.xml</param-value> </init-param> <load-on-startup>1</load-on-startup> </servlet> <servlet-mapping> <servlet-name>appServlet</servlet-name> <url-pattern>/</url-pattern> </servlet-mapping> </web-app> Points To Note :
- Define DispatcherServlet, which will act as a front controller to route the requests
Create a Spring Controller :
package com.spring.controller; import org.springframework.stereotype.Controller; import org.springframework.ui.Model; import org.springframework.web.bind.annotation.ModelAttribute; import org.springframework.web.bind.annotation.RequestMapping; import org.springframework.web.bind.annotation.RequestMethod; @Controller public class LoginController { @RequestMapping(value = "/login", method = RequestMethod.GET) public String init(Model model) { model.addAttribute("msg", "Please Enter Your Login Details"); return "login"; } @RequestMapping(method = RequestMethod.POST) public String submit(Model model, @ModelAttribute("loginBean") LoginBean loginBean) { if (loginBean != null && loginBean.getUserName() != null & loginBean.getPassword() != null) { if (loginBean.getUserName().equals("chandra") && loginBean.getPassword().equals("chandra123")) { model.addAttribute("msg", loginBean.getUserName()); return "success"; } else { model.addAttribute("error", "Invalid Details"); return "login"; } } else { model.addAttribute("error", "Please enter Details"); return "login"; } } } Points To Note :
We have created two handler methods
- init
This is a default handler method for HTTP GET requests. The RequestMapping url is "/login". - submit
This method is called whenever the form get submitted because the HTTP type for this method is POST.
All the form elements are fed into the LoginBean object and we retrieve them using @ModelAttribute annotation
Run It :
To run this application, we can make use of the below URL.
http://localhost:8080/Spring-MVC-LoginForm/login
 Error Response :
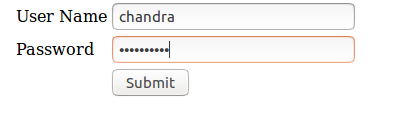
 Giving Valid credentials :
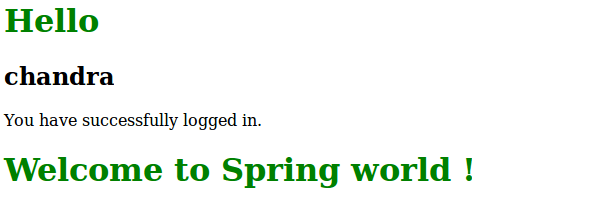
Success Page :
The complete Example is available for download : Spring MVC Login Form Example with STS (NEW)
Happy Learning 🙂
Share a word.
silbermanbreas1983.blogspot.com
Source: https://www.onlinetutorialspoint.com/spring/spring-mvc-login-form-example.html
0 Response to "Java Spring Simple Login Example"
Post a Comment